Converting a chest freezer into an ice bath or ice plunge

First, check that your family don't need the chest freezer
The conversation with my wife Gemma went something like this… “I need to empty the freezer as I want to turn it into an ice bath”… “No, you’re not. You will definitely electrocute yourself, besides what about the food in there”? If you’re sharing a household and appliances, get aligned first!
Up front disclaimer alert. Clearly, a chest freezer is not designed to hold several hundred litres of water. I’ve done it, used it, loved it, and I am still alive. However, it may or may not be one of the stupidest things I’ve ever done, so make your own call on that.
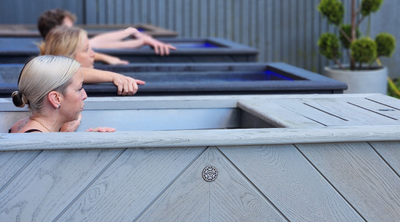
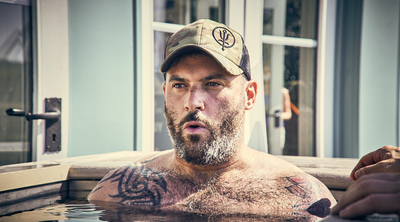
A DIY chest freezer Ice Bath does the job
Buying Brass Monkey isn’t the best option for most people, simply because they’re expensive to make and purchase. So, for the majority of people who are not near to nature, who are on a budget and want an ice bath at home, it will make considerably more economic sense to convert a chest freezer. It’s true for four simple reasons:
- 1. They’re inexpensive and very fast to convert (see below).
- 2. You don’t need to waste money (or impact the environment) by buying new units either, there are many on eBay/Gumtree, all of the time.
- 3. If you don’t like it and don’t commit, you’re not facing huge costs and waste. The chest freezer itself is easily recycled (and was already second-hand possibly, if you bought it on eBay).
- 4. It’s a 100% genuine ice dip experience that’s very different to cold showering – ice water offers a different hit and lift, and chest freezers make a lot of ice.
A note on chest freezer purchase
I measured myself in a regular bath and used those dimensions to figure if the chest freezer I had would be big enough (at 450 litres) and it was fine for me, I am 5’8”, average weight, so not big/tall. Where possible, I’d go a little bigger, 500+ litre volume – you want to be up to your neck/ears, right over the vagus nerve. A 500-550 litre size will be fine for most people, if you’re bigger, go bigger. Also, a counter balance lid is vital, it needs to stay up when you’re in!
When it comes to the converting part, there are essentially two schools of thought, they vary in time, cost and how long the unit will last, as well as user safety.
1. The ‘quick and dirty’ DIY ice bath method
So this was my preferred route, mostly due to my impatience and lack of time. I just wanted to get in ASAP. It’s fast, cheap and 'kind of' effective. No matter, you’ll get a tonne of ice for very little input, all within 36 hours.- 1. Clean out the bath thoroughly, no debris or dirt or oily residue if you’re using a second-hand unit.
- 2. Silicone seal everywhere that there is a gap – up each corner, around the bottom, around and plug or drain, and also around the top where the upright meets the top frame. Silicone everywhere thinly, less is more, to be sure to get into the gaps.
- 3. Repeat step 2 a second time, thinly, even do a third, but no more as thick silicone peels off more easily.
- 4. If you’re smart (I wasn’t – I stopped on step 3), you could Visqueen (plastic lining sheet) the unit, hospital folding into each corner and tape the top to the door frame. If I had done this, then mine would not have leaked.
- 5. Get a cheap digital thermometer, like this one
- 6. Get a plug timer to control the on/off of the refrigeration cycles.
- 7. Add food-grade hydrogen peroxide to the water to help slow the build-up of bacteria.
This is the original YouTube video that I followed here. There are many, many, many videos like this on YouTube.
There are pros and cons to ‘quick and dirty…
The benefits of this approach are primarily around speed and cost, it’s very cheap. A huge downside is that water temperature management is done by tweaking how long the freezer is switched on. I would have mine switched on for 4 hours in the summer and 1-1.5 hours in the winter in every 24-hour period, I constantly adjusted this through the seasons based on the temperature that I wanted. The other big pain is the weekly/fortnightly emptying of the water as it got dirty with debris, and a lovely thin layer of ‘gunk’ would sit in the bottom. I went on holiday for a week at a time the freezer needing emptying, only to notice on my return that the water smelled like ham. Yep, dead pig, drink that smell in.2. The (much better) DIY Ice Bath Pro method
This is for the amateur pro, a much more serious DIY solution. It takes time and a few parts but there’s not a tonne of skill involved as the thinking is already done for you, the DIY Pro approach will certainly make the unit safe and clean and friendlier to use. Here is a great reference that I found, trawl through that, I’ve summarised the big improvements compared to the above method:- 1. You can manage temperature by using a digital temp controller to automate the on/off of the chest freezer. Set the temperature and forget – this makes sure you don’t have excessive ice build-up and the tub is actually usable.
- 2. There is an inline filter and an ozonator to keep the water clean, this saves so much time emptying the unit every week or so. The author also recommends chlorine and bromine – not sure why as it’s cold, not warm water, it certainly won’t hurt unless you’re anti-sitting in a mild bleach solution.
- 3. A GFCI safety switch to help protect against electrocution (still, always unplug before you get in, though!).
There are pretty apparent advantages of option 2 – it’s safer (though you’ll still be wise to unplug before getting in) and most certainly cleaner, with no weekly pump and re-fill.
DIY Ice bath chest freezer – closing thoughts
-
1. Always respect a chest freezer is not built for this, it’s a good starting point amongst the excitement!
-
2. Chest freezers make a tonne of ice, great, and this can actually can be a pain. I would often come to get into my freezer, and there was so much ice at the bottom or stuck to the sides, it renders the unit useless or very, very unpleasant to get in, which can last for a few days. Ice on the top is nice. On the bottom, not so much. The DIY Pro method certainly helps off-set this.
-
3. Create a badge/sticker to remind you to unplug the unit before you get in. For the first few months, I kept forgetting and got in ‘live’. Risky. I draped the cable over the freezer in the end, a physical reminder to unplug and replug.
-
4. Clean and prep the unit meticulously before applying silicon. A year after I started my chest freezer journey, it started a slow leak, I am sure this is because the silicone didn’t have good enough adhesion. It was ruined and, more importantly, a death trap if it were to be switched on with water dripping onto the floor. A blessing too though. It’s partly how Brass Monkey came to be.
-
5. Consider the full DIY Pro conversion. I rushed into the ‘quick and dirty’ due to poor research. When I read the DIY Pro method now, it’s obviously way better – by that, I mean safer, more usable and much more likely to last, and it won’t ever smell like ham.
There’s a whole community of people doing this, and there are even detailed books and tutorials out there with people selling specialist parts (see here). Over on Facebook, there are over 30,000 ice bath chest freezer enthusiasts. You can join the group and talk to them here.
Good luck with your conversion if that’s what you decide to do!
If you’ve any other thoughts or tips, chat with us on our social channels. We like to hang out on Facebook, Instagram and TikTok.